The write protection It is a policy that has a unit that does not allow us to delete or modify the information it contains. This can happen, either due to the fact that the user has few or no privileges regarding the writing of files or that this information is directly protected by the hardware..
It is a common occurrence to find “the disk is write protected” when editing, saving a document or even when formatting a removable disk. You may have a write protection error imposed by the OS or the device comes with that factory protection, which stops the operation regarding the files in memory.

On a daily basis, we use storage devices in a computer, and some surely have once thought to face the problem of disk malfunction or configuration, which is mainly about "the disk is write protected".
It is necessary to know that the operating system generally write-protect system files and administrator folders, to prevent users from damaging the proper functioning of the computer.
There are certain benefits of having write protection, such as protecting those files that are running and that contain lines within their structure that indicate their protection, avoiding possible failures.
Note: this process is advanced. To avoid losing information on your computer, it is important that you make copies / backups of them. If you are not sure or do not understand what you are doing, it is better to leave the process in the hands of a professional.
Article index
2. We open the Windows 10 start menu. Once there we will write run, you will see how an application suggestion appears with that word, and we will press the Enter key.
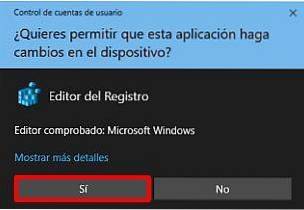
3. An application will open and in it we will write the word "REGEDIT", then press the Enter button. This is to open the Windows Registry Editor. The user account control will appear and it will ask us if we want to run this program, we will click Yes.

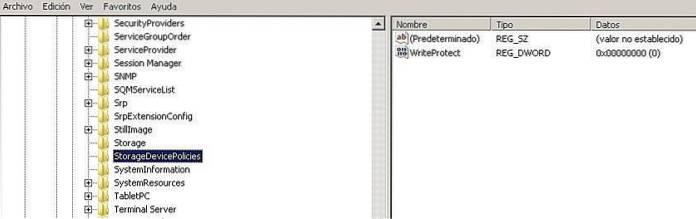
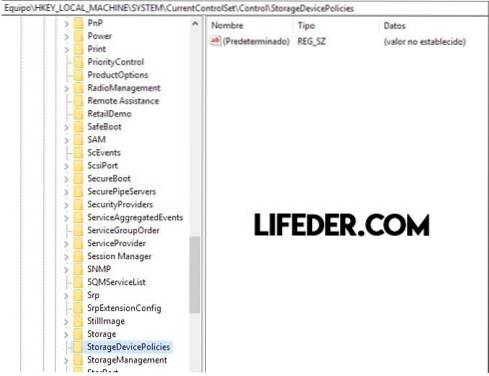
4. Having open the Windows registry (we will see many folders, try not to modify other than the one specified here), we will open the folders in the following order to be able to access the path we need to enter: HKEYLOCALMACHINE-> SYSTEM -> CurrentControlSet -> Control -> StorageDevicePolicies.
5.If the “WriteProtect” file is not found in the destination folder, we will proceed to create it by doing:
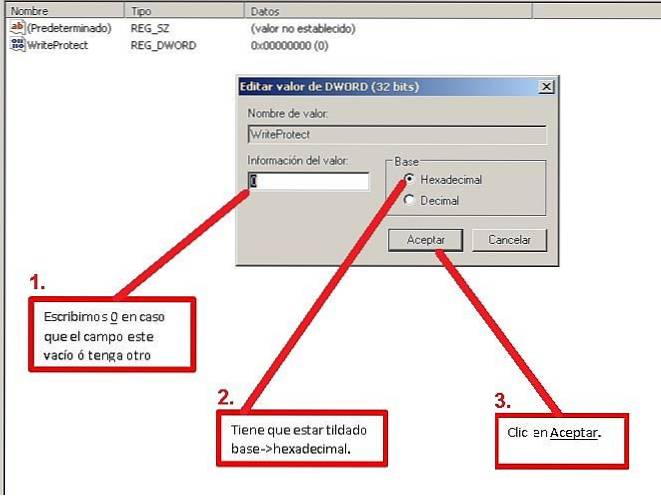
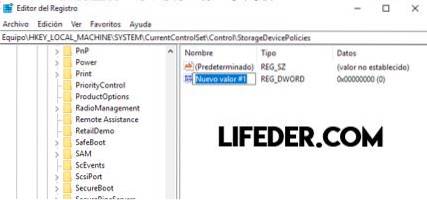
5.1-Right click: Select new, then DWORD Value (32 bits). Once created we right click on it and go to the modify option (follow the steps in the image: 1,2,3).
6. We restart the computer so that the changes made are made, and that's it! You will be able to modify / create information on your storage devices.
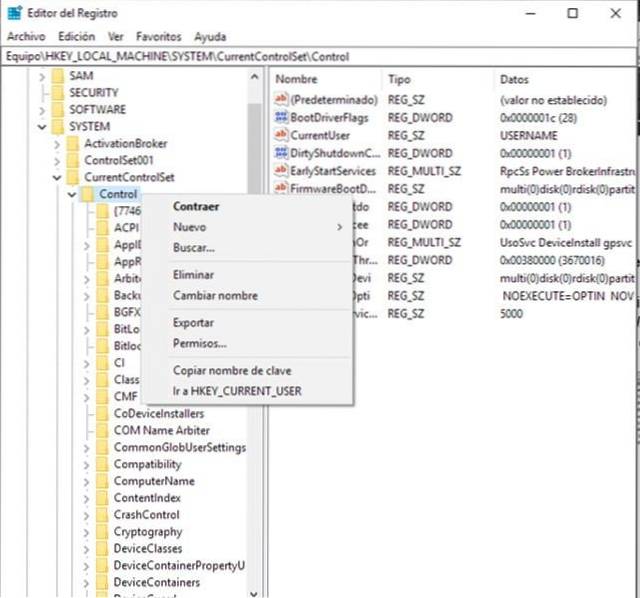
1.-Once inside the Windows registry editor, navigate to the following location: HKEYLOCALMACHINE -> SYSTEM -> CurrentControlSet -> Control. Right click on this folder and an options panel will appear.
2.- We will click on again and then on Password.
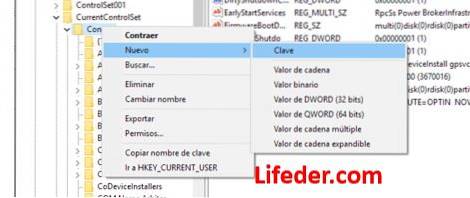
3.- It will show us a folder which we must rename as “StorageDevicePolicies”. Once at this point we will see that within the folder there is only one file, that means that we must create "WriteProtect" for everything to work.
4.- We will proceed to create it by: Right click again -> DWORD value (32 bits).

5.- We will rename it "WriteProtect".

7.- We restart the computer so that all the changes made take effect.
Clever! You can now save, move and edit information in the files that were protected.
Note: Remember that this tutorial is made in order for your device to have write permissions and to do it in MacOS you must format, so you will lose the information that the device contains. So it is a good time for you to back up the information that the device contains.
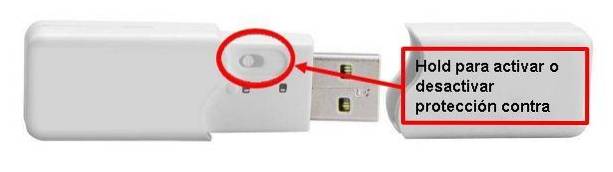
Is our device protected?
We must check if our device has some small "lever" (also called HOLD), which activates or deactivates the write protection within MacOS X.
MacOS sometimes fills with viruses and this tends to be a reason why it crashes. There is also a reason why the write system is disabled. This occurs when the storage unit to be used no longer has any space left..
In general, we believe that all computers work the same way, and that their Operating Systems do not differ from each other. Well that is far from reality, Windows uses NTFS as the file system, while Mac does not.
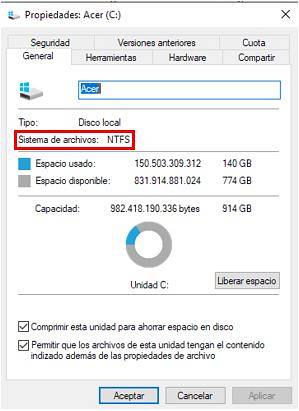
As we see in the two images, while Windows uses NTFS as the default file format, in MacOS it uses ExFAT or Flat to be able to have the permissions to write, modify or delete content.
To get to this point, follow these simple steps:
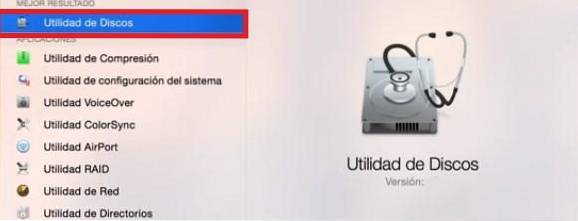
1-We will position ourselves in the search engine of our Mac and type "Disk Utility".

2-Select the application indicated in the image, by clicking.
3-It shows us a screen with all the storage devices working on your Mac computer. Select the device and click on the "Delete" option..
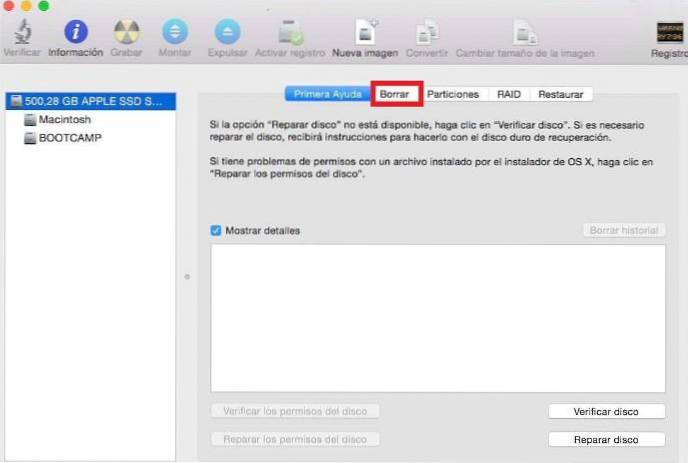
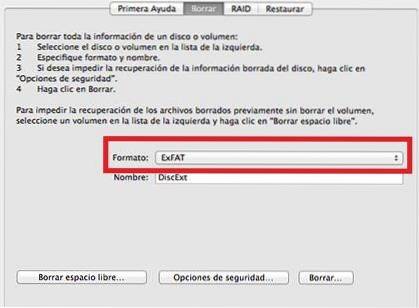
4-Then we will go to the "Format" tab, by clicking on it.
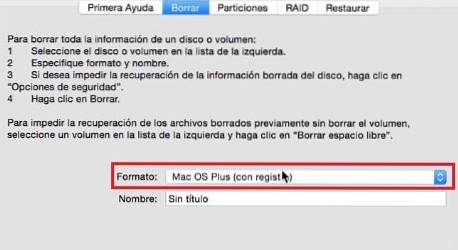
5-A menu will be displayed, where it will give us different options for the format of our storage device (step 1). This time we will use the first one that appears in the list "Mac OS Plus (with registry)" and we will give a name to the device (step 2). Then click on "Delete ...".
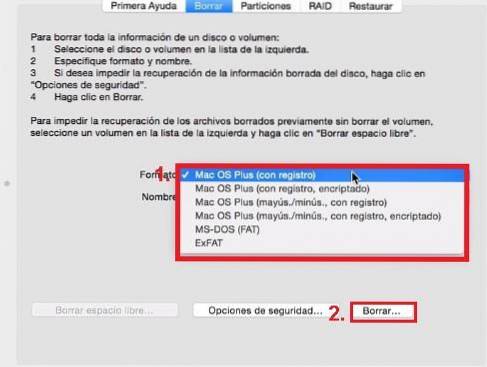
6-We click on "Delete", and automatically the disk utility will give the new format along with the assigned name.
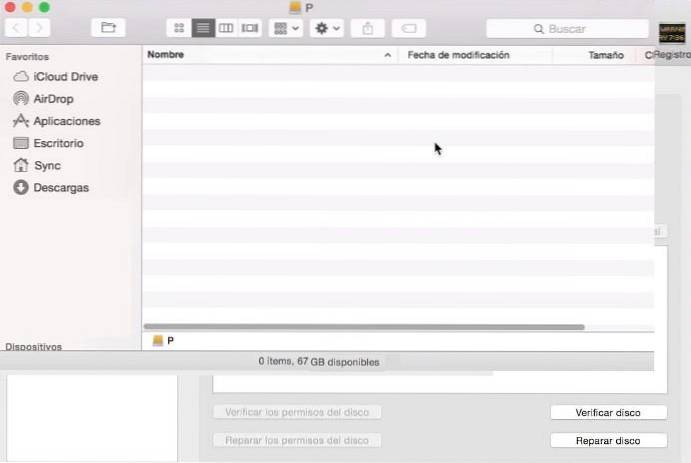
7-Ready! Our storage device is now available to save, delete and edit files.

7-We click on "Delete", and automatically the disk utility will give the new format along with the assigned name.


Yet No Comments