The missing NTDLR file (short for NT Loader) in Windows, it occurs when we want to access the operating system and a black screen appears with a message similar to: “NTLDR is missing. Ctrl + Alt + Del to restart ”or“ Missing bootmgr. Ctrl + Alt + Del ”, which means that our OS suffered some misadjustment or unexpected failure.
What we should know about this file is that it is responsible for the normal boot of the operating system. In the first versions of Microsoft Windows -including Windows XP- the file is called NTDLR; from Windows 7 and Windows 10 the equivalent name BOOTMGR is used.
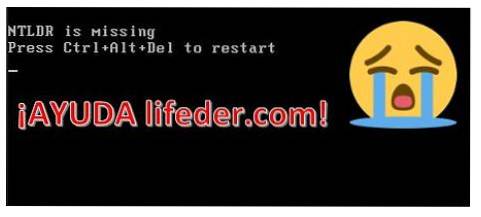
When we want to access our operating system and we cannot achieve it due to that terrible message, the warning “NTLDR / bootmgr is missing” jumps in front of our eyes, and we will know that Windows could not continue because there is a “failed error”.
This problem is common and occurs for a number of reasons. It may be because we have installed an operating system other than Microsoft, which takes over the MBR (master boot record) and, when we want to install Windows (or run it if it is already installed), it does not recognize the boot.
It can also be generated by a virus that is responsible for corrupting the files, entering the Windows boot record and thus corrupting the MBR.
Another reason may be because our Windows becomes unstable after an update (which for some happens inexplicably), or that perhaps the hard disk is damaged or about to be damaged..
Article index
There are many ways to repair our Windows boot, such as repair through Live-CD, bootable USB or using recovery tools.
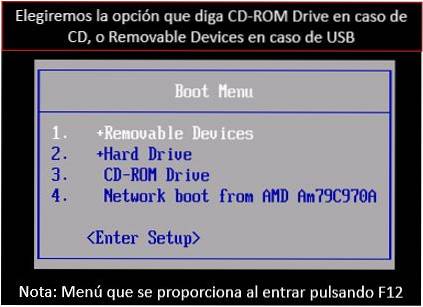
1- Insert the Windows 10 (7) CD / DVD and restart the computer to enter the installation menu (the BIOS must be configured to start from the CD / DVD reader; otherwise, when turning on the computer, press F12, and from there choose "start from CD").
If you do not have an installation CD, you will have to download the .ISO image of the operating system and make it bootable from your pendrive.
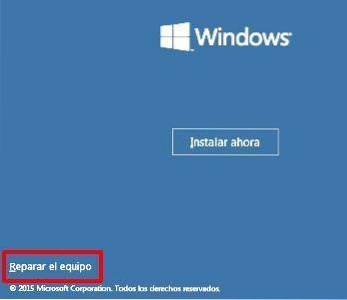
2- Enter the Windows 10 (7) installation menu and choose the "Repair" option.
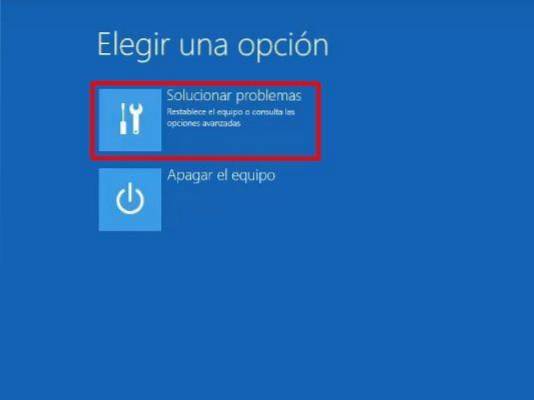
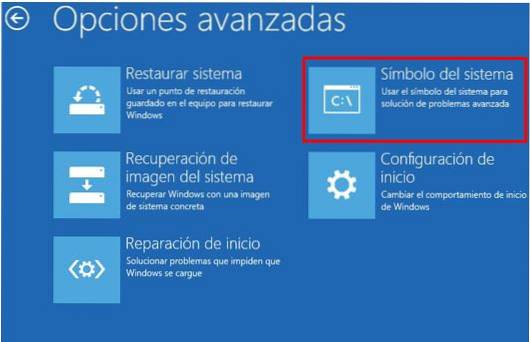
3- In the next menu, choose the option "Troubleshoot".
4- Select the option "Command Prompt". There we will work with the Windows console to solve our failure.
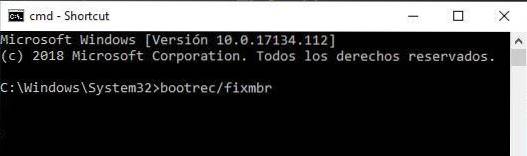
5- When opening the console, write "bootrec / fixmbr" and press enter. Here we change the startup registry of the operating system.
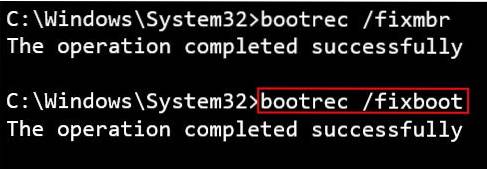
6- Write the following command in the console: “bootrec / fixboot”. Here the operating system boot is repaired.
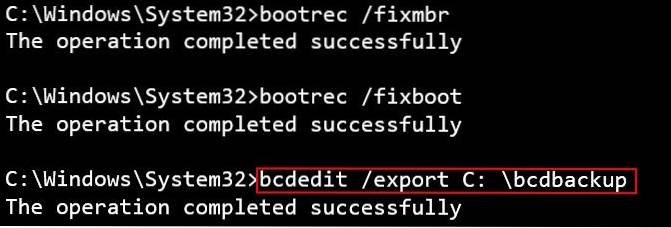
7- Write the following command in the console: "bcdedit / export C: \ bcdbackup", without the quotes.
8- Write the following commands in the console, in the same order as they appear here:
- "Ren C: \ boot \ bcd -h -r -s"
- "Ren C: \ boot \ bcd bcd.old"
- "Bootrec / rebuildbcd"
- "1"
- "Y"
- "Exit"
Every time you type a command, press ENTER. Each command must be written without the quotes.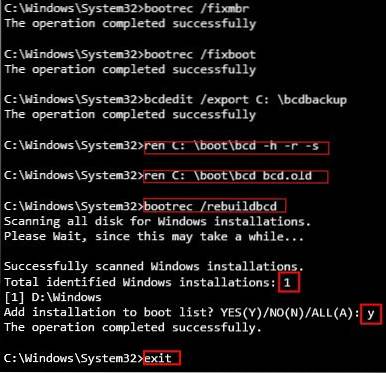
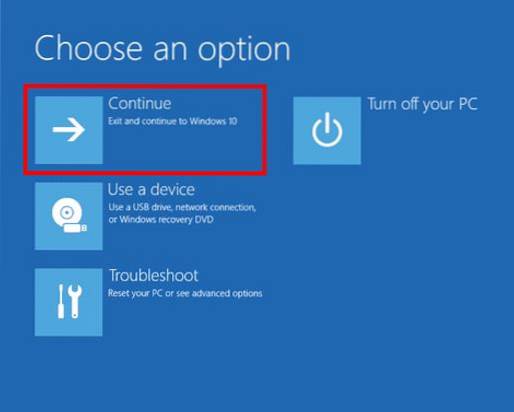
9- Now we will click on "Continue". After this your computer will restart normally and your problem should be solved.
1-Open the CD reader of your computer and insert the Windows XP CD / DVD and then restart the computer to enter the installation menu (the BIOS must be configured to start from the CD / DVD reader; if this is not thus, when you turn on the computer, press F12, and from there choose to start from the CD).
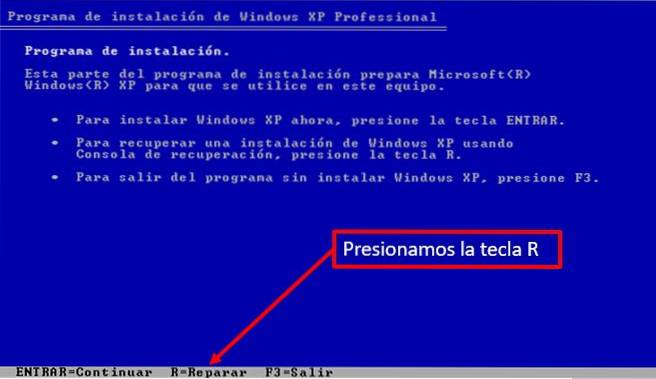
2- In the installer of our software The following options will appear: "Enter the installer" (ENTER), "Repair" (R) and "Exit" (F3). Press the letter R on the keyboard.
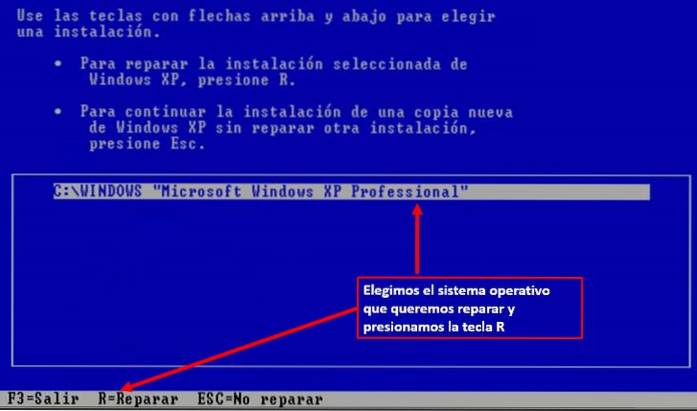
3- After this, the Windows XP repairman indicates in which partition the operating system is located.
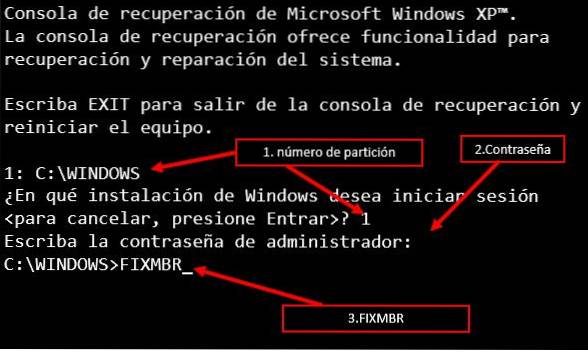
4- It will start a screen of the cmd type. In this place the number where the partition is located and the administrator password (if your computer has a password). Then type "FIXMBR" and press ENTER on the keyboard.
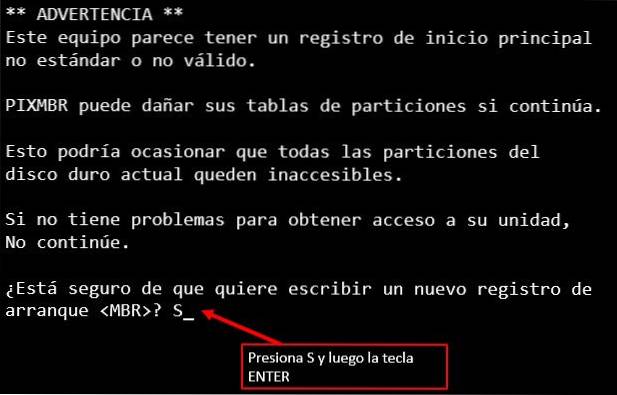
5- The system will show a warning (here the system startup record is changed) with the question "Are you sure you want to write a new boot record?". Type the letter S and press ENTER.
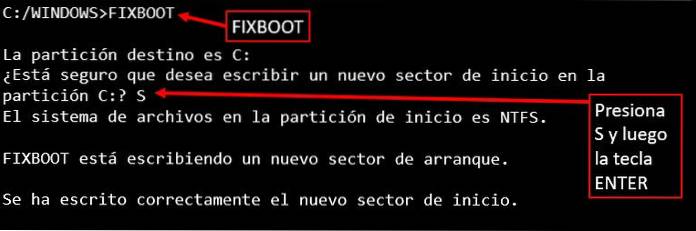
6- Repair the boot.ini of the operating system using the command "FIXBOOT" in the same way as the previous one. After typing “FIXBOOT” type S and then press ENTER.
7- We are one step away from recovering our operating system. To do this, write the command "CHKDSK / R"; this command verifies that our hard drive has any damage and repairs it if possible.

After successful completion, type the command "EXIT", remove the CD / USB and restart your computer normally.
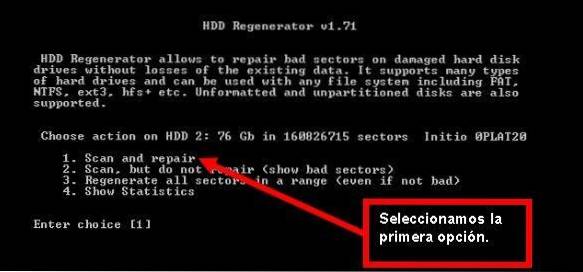
Regardless of your operating system, if you fix this bug and it keeps appearing frequently, it could be that your hard drive is getting damaged or that a sector is damaged. In this case you can try a tool called: "HDD REGENERATOR".
If that does not solve the problem, it is time to think about acquiring a new hard drive.


Yet No Comments