The bacterial smear is a thin film extension of a suspension of bacterial microorganisms that is made on a transparent glass plate or slide, for observation under an optical microscope.
The extension in the form of a film is carried out in order to separate the microorganisms as much as possible, since if they are grouped the observation is not clear.
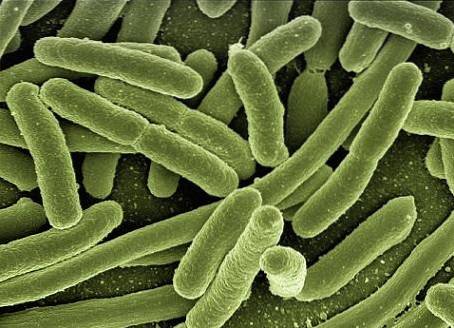
In the study of bacterial cultures, smear preparation, fixation and staining techniques are used to better analyze them. Due to the small size of microorganisms, the use of an optical microscope is necessarily required for their observation..
Optical microscopes are indispensable instruments for observing smears. These employ optical lenses and light allowing the viewing of the samples with large magnification..
In general, living cells do not have mostly colored structures, seen with the light microscope they are colorless, transparent samples, and they show very little internal contrast and with their environment..
Observation with the simple bright-field light microscope, without the use of auxiliary staining techniques, is very limited and is only used in some cases, such as in the observation of the movement of microorganisms.
For optimal observation of microorganisms, a balance must be struck between contrast and resolution. Cell details cannot be seen under a microscope, even with high resolution; the use of dyes is required through staining techniques, which provide contrast for observation.
Article index
To achieve excellent contrast there are sophisticated microscopes called phase contrast microscope, differential interference microscope and dark field microscope. This type of microscope is used to observe bacterial structures such as sheaths and filaments, among others..
Staining is a simple technique to increase contrast that is achieved with a brightfield microscope. In this technique, different dyes can be used that significantly improve microscopic observation..
The stains are carried out directly on the smears or extensions of the suspensions of microorganisms on the slides, previously dried and fixed..
Fixation is a technique used to preserve cell structures; causes inactivation of microorganisms and adhesion to the glass of the slide. There are different fixation treatments: heat fixation and chemical fixation.
This is the most widely used method for observing bacterial smears. The technique consists of passing the bacterial suspension of the smear through the flame of a lighter. This technique is able to preserve the external morphology of bacteria, but destroys their internal structures.
Chemical fixation uses preservation chemicals such as formaldehyde or formalin, ethanol, and acetic acid, among others. The advantage of using chemical fixing agents is that the preservation of the internal cellular structures of the microorganisms is achieved..
The most common procedures for staining a previously dried and fixed smear are positive or simple staining, differential staining, and negative staining. There are also special techniques for staining of particular cell structures (capsule, spore, flagella).
Positive or simple staining is the most widely used smear staining technique. It uses dyes that have the ability to bind to certain microbial structures, allowing them to be observed under a microscope.
These dyes have chromophore groups (colored portion) in their chemical structure, with alternating double bonds and single bonds (conjugation). These bonds can in turn establish ionic or covalent bonds with some cellular structures..
The dyes used in positive or simple staining are mostly chemical derivatives of the aniline (colored organic salts).
On the other hand, among the colorants we can find some with a basic pH and others with an acidic pH..
In basic dyes, the chromophore group has a positive electrical charge. The vast majority of prokaryotic microorganisms have a neutral internal pH, and their cell surface is negatively charged. Through this electrostatic interaction, the chromophore binds to the cell and stains it.
Examples of basic dyes are methylene blue, crystal violet, malachite green, basic fuscin, safranin, among others..
In acid dyes, the chromophore group has a negative electrical charge. These are used to stain proteins with positively charged amino groups. Examples of acid dyes are acid fuscin, rose Bengal, Congo red, and eosin.
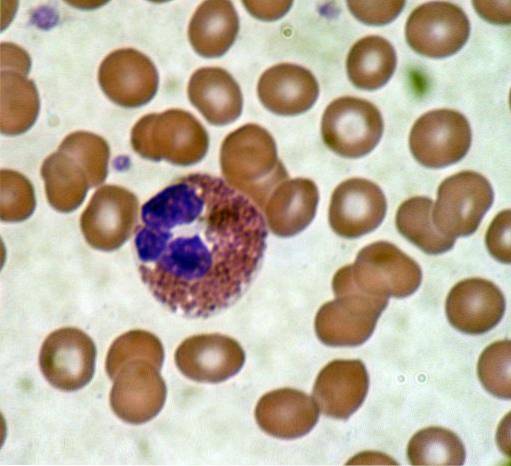
The differential staining technique consists of applying two dyes of different color or intensity, to distinguish different microorganisms under the microscope. Gram stain and acid-alcohol resistance stain are the most widely used differential stains in bacteriology.
The Gram stain is used as a preliminary test to know the shape, size, cell grouping, as well as the type of cell wall. Using the Gram stain test, cell wall bacteria are classified into Gram positive bacteria and Gram negative bacteria..
In this technique, chemical dyes are used that do not penetrate the cell interior, but make the medium in which the microorganisms are appear as a black background..
In the negative staining technique, the smear is made with a drop of India ink or nigrosin suspension, which after allowing drying at room temperature forms a film opaque to the passage of light. In this way, the microorganisms are seen as bright shapes on a dark background..
1.- Wash the slides very well, dry with absorbent paper and label them. The label must indicate the content of the preparation, the date and the name of the person who processed it..
2.- Light the lighter and sterilize the inoculation loop in the flame until bright red.
3.- Let the handle cool.
4.- Take the bacterial culture tube, remove the cap and quickly pass the mouth of the tube near the burner flame (flame).
5.- Insert the inoculation loop into the tube containing the bacterial culture and take the sample.
6.- If the culture is in liquid medium, place the sample taken with the handle in the center of the slide and spread it carefully in a circle of approximately 2 cm in diameter..
7.- Sterilize the inoculation loop again.
8.- Allow the smear to dry in the air.
9.- Repeat steps 3 to 8 three times.
10.- If the culture is in solid medium, a drop of distilled water must be previously placed on the slide. This is done to mix a small sample of the culture taken with the inoculation loop, as directed in steps 2 to 5 (aseptic conditions).
11.- Spread the diluted sample with the drop of water on the slide and repeat three times.
1.- Add two drops of methanol or absolute ethanol to the dry smears-from cultures in liquid medium..
2.- Allow to air dry away from the lighter.
3.- If the smear comes from a culture in solid medium, the dry smear is fixed with heat, passing it 2 to 3 times quickly through the hottest part of the lighter flame..
4.- Touch the lower part of the smear with the dorsal part of the left hand (for right-handers; otherwise, use the right hand) and check that it is cold.
1.- Add 2 drops of the selected stain to the smear and leave to act for the time required in the specific protocols for each stain (generally between 1 and 5 minutes).
2.- Some stains require the use of heat for their activation, in which case one must be very careful when heating the slide in the lighter flame (manipulate it with tweezers and avoid boiling). An overheating of the smear can destroy the cells to be observed..
3.- Remove excess colorant by washing with distilled water from a picette. Remove the wash water by gently tapping the slide on its edge, tilted on the work table.
4.- Allow air drying.
5.- Depending on the type of observation, a coverslip is used or not at this stage. The coverslip protects and preserves the smear. If an oil immersion observation is made at this stage, no coverslips are used but the smear cannot be preserved.
1.- Immerse the smear successively in each of the solutions indicated below, for a minimum of 5 minutes. The purpose of these "baths" is to leave the smear completely dehydrated. Each reagent should be well drained before introducing the smear in the next bath..
The order of the dehydrating baths is as follows:
Then allow to air dry.
2.- Mount the coverslip, preferably 22 × 22 mm, using Canada balsam or other mounting medium.


Yet No Comments